Notes on installing Panabit Professional Edition on public cloud
Release date: Dec 22,2022 Th .
Panabit Version: R0.00[TANG(Datang)r3], Build date 20221031.132102 [Linux 3.10]
Author: Duke Hsu
This note records the process of installing panabit using a single network card lightweight cloud server.
Preparation
cloud server
Operating system: Centos 7.6 x64 Configuration: 2C 8G 1 eth
Panabit material
Panabit one-click upload cloud server tool (including installation and decompression GUI.exe)
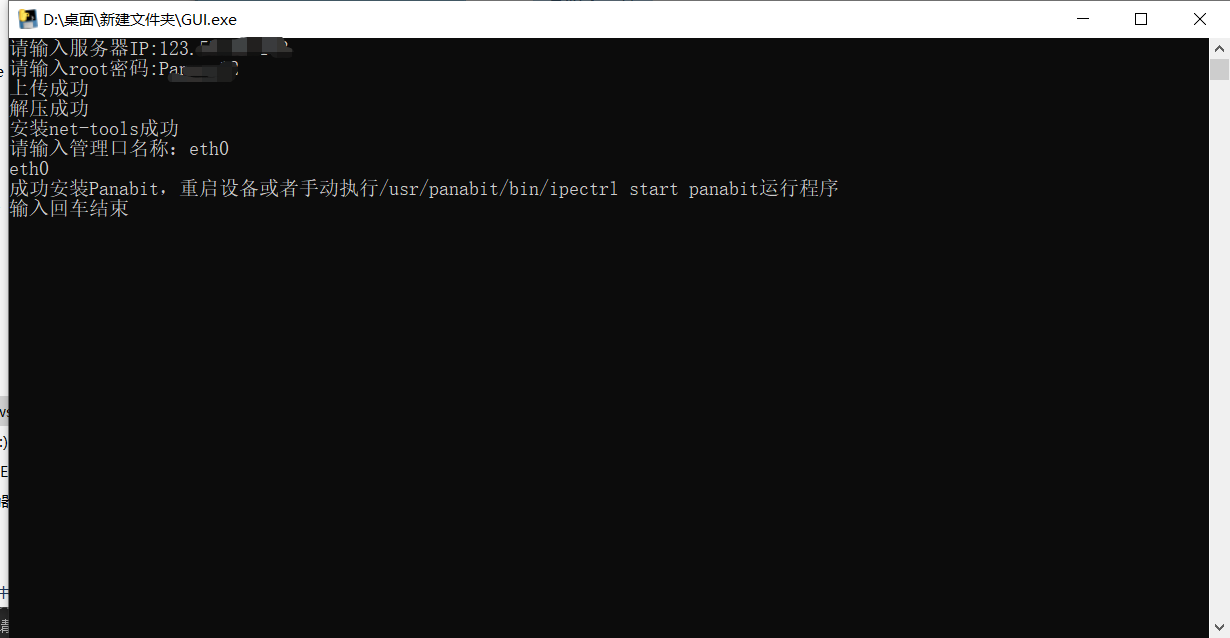 Panabit Professional Edition Linux installation package (LPanabitOEM_WUDAIr1_20201125_Linux3.tar.gz)
Cloud server IP address and password
The cloud server needs to open the SSH port and service
Panabit Professional Edition Linux installation package (LPanabitOEM_WUDAIr1_20201125_Linux3.tar.gz)
Cloud server IP address and password
The cloud server needs to open the SSH port and service
Installation steps
Cloud server initialization
Turn off firewall
#停止防火墙
systemctl stop firewalld
#关闭开机自启动
systemctl disable firewalld
Check network card configuration
#打印IP地址信息
ifconfig
#查看网卡详细信息(ifcfg-eth0为网卡名,有些不一样,视情况而定)
cat /etc/sysconfig/network-scripts/ifcfg-eth0
Record the IP address information for later use in Panabit configuration
Panabit installation
Use the GUI.exe tool and follow the prompts to upload the installation package to the cloud server for fully automatic installation.
After restarting the server, you can use the web to log in to Panabit for management.
- If it cannot be accessed, please check whether the management port name is inconsistent with the cloud server network card name.
- If a security question is prompted, please use a lower version of Chrome browser to access, such as 360 Rapid Browser.
Panabit configuration
Network interface configuration
Change the eth interface direction to external in 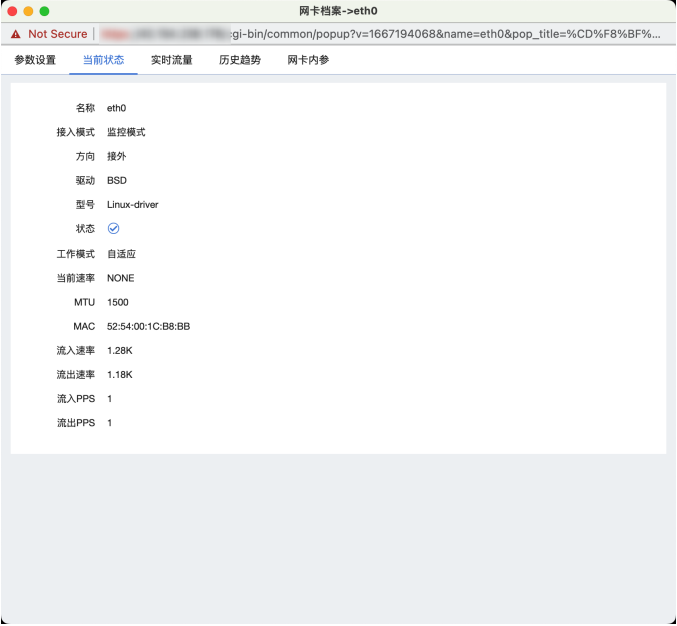
Add an interface in Application Routing-Interface Line-WAN Line as shown below
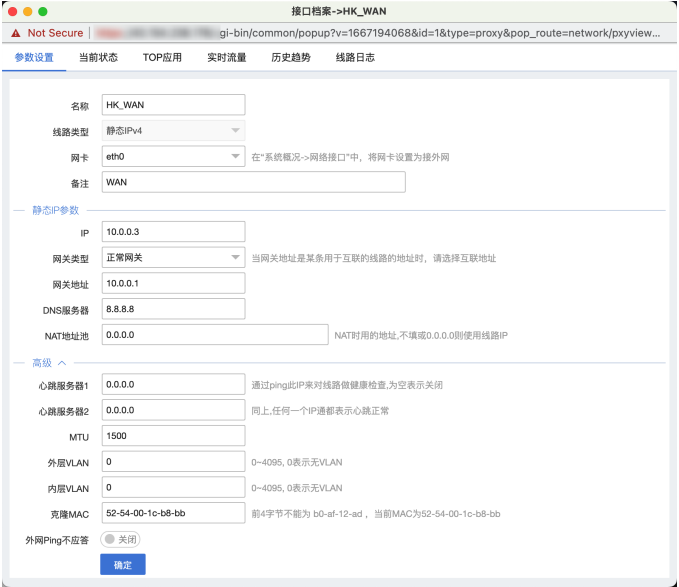
please note
- The IP address of the WAN line is the intranet address of the cloud server.
- Need to clone mac address
- Use ping to verify that the configuration is correct and valid
SD-WAN configuration
In panabit, they call the sd-wan function integrated into panabit the iWAN service. The win client communicates with the server based on the gretunnel protocol (wintun.dll) (please delete if there is any error)
Panabit’s SD-WAN server configuration
User Authentication-Account Management-Organizational Structure 创建组织构架> 添加用户组 >为用户组设置地址池
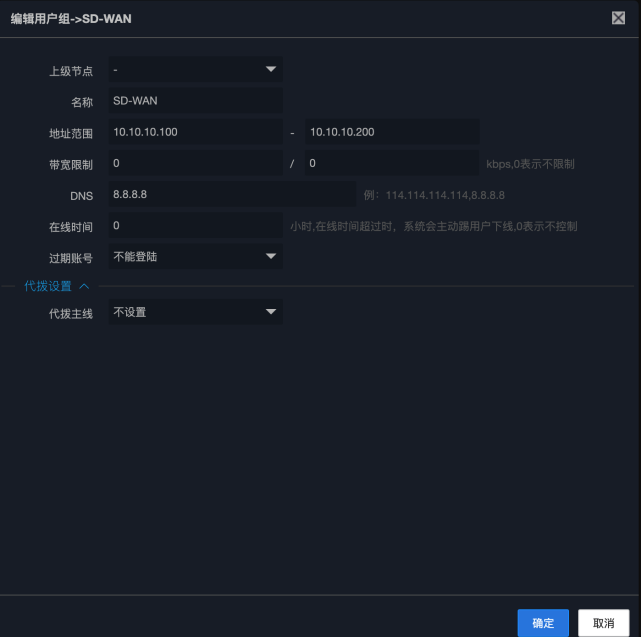
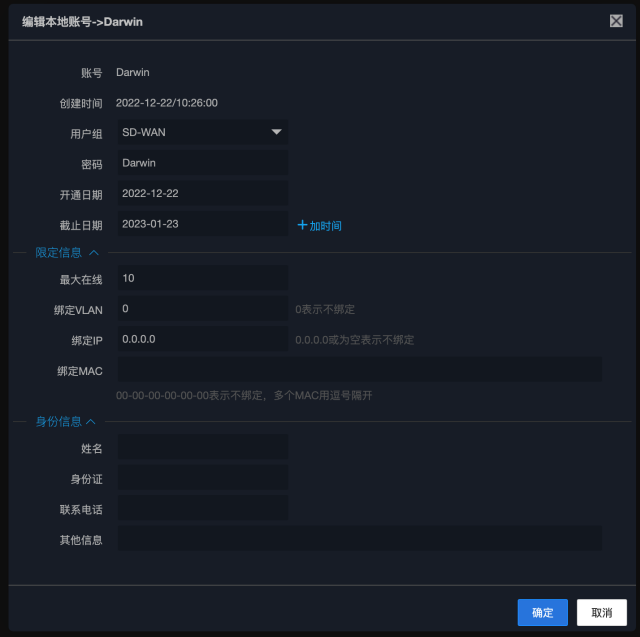
User authentication-account management-organizational structure-local account 添加用户账号-设定用户组-其它信息
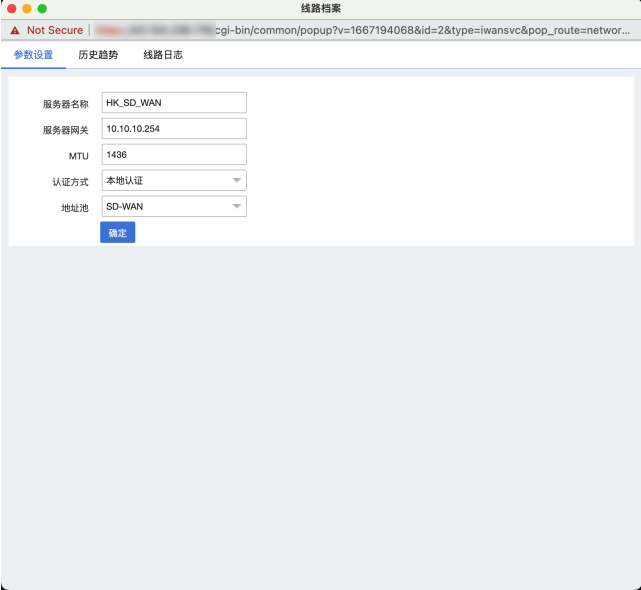
Application Routing-iWAN Services-Service List
新增一个iWAN服务-设置服务名称和网关(服务网关和地址池不能与其他内网冲突)
Application Routing-iWAN Service-Service Mapping
Enter the service name you set. Set the service port you need and click Add
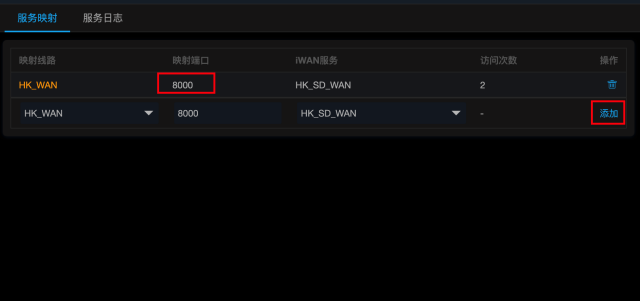
please note
You need to configure the cloud service firewall to allow changing port access permissions UDP&TCP
Application Routing-Policy Routing-IPv4 Routing
添加一个策略将iWAN的服务网关转发到WAN(如果你有多条线路可以设置你想要的线路)
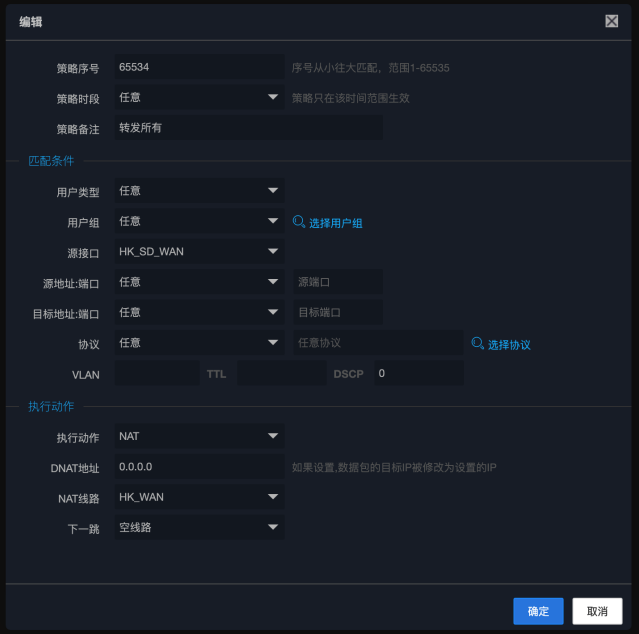
Following the above steps, Pnabait’s SD-WAN server is configured. On the client side, Pnabit provides multi-platform and multi-mode connection solutions.
- Linux client
- Windows client
- All versions of Panabit have the option to provide iWAN interface
SD-WAN client connection
Panabit device
Application routing-interface line-WAN line
新增一条iWAN类型的外网线路 ,设置好服务端地址和端口以及MTU ,账号密码,连通之后你可以使用ping来验证是否工作。
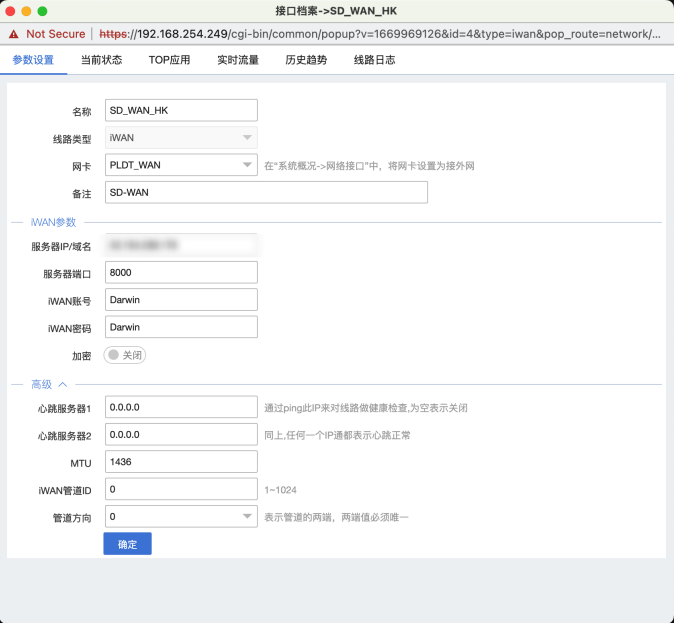
please note
- If you cannot connect, please check whether there is any conflict in the server address pool configuration.
- Is the account password incorrect?
- Whether the cloud service firewall has been configured and allows the service port
- If you cannot access the Internet, please check whether forwarding is configured for policy routing in application routing.
At this point, the notes on installing Panabit and configuring SD-WAN in the public cloud are completed. I used one network card to configure SD-WAN, which is cheaper than the 3-4 network cards required by the official description. Of course, the current business volume is small and no problems have occurred. I don’t know if other problems will arise when the business volume increases.